2.2 Installing the MyID Installation Assistant
You must install the MyID Installation Assistant on each server on which you want to install MyID. On a single-tier system, where the application, web, and database components are all installed on the same PC, you can install all the MyID components at the same time. To implement a split deployment, where the MyID application, web, and database components are installed on different physical machines, you install the MyID Installation Assistant on different machines, and then follow a strict implementation procedure to ensure the various servers are created in the correct order; see section 8.2, Split deployment for details.
2.2.1 Trusting the signed scripts
The scripts that are used in the installation process are signed to confirm that they were provided by Intercede and have not been altered. If your system is configured to allow only signed PowerShell scripts to be run, you must trust Intercede as a publisher before you run the installation program. If you do not follow these instructions, the scripts will not run.
To trust Intercede as a publisher:
-
In the following folder:
<install folder>\Support Tools\MyIDInstallationAssistant
right-click the following script:
MyIDInstallationAssistant.ps1
-
In the Properties dialog, click the Digital Signatures tab.
-
Select the Intercede signature in the signing list, and click Details.
-
Click View Certificate.
-
Click Install Certificate.
-
Select Local Machine, and click Next.
-
Select Place all certificates in the following store, click Browse, select the Trusted Publishers store, and click OK.
-
Click Next, then click Finish.
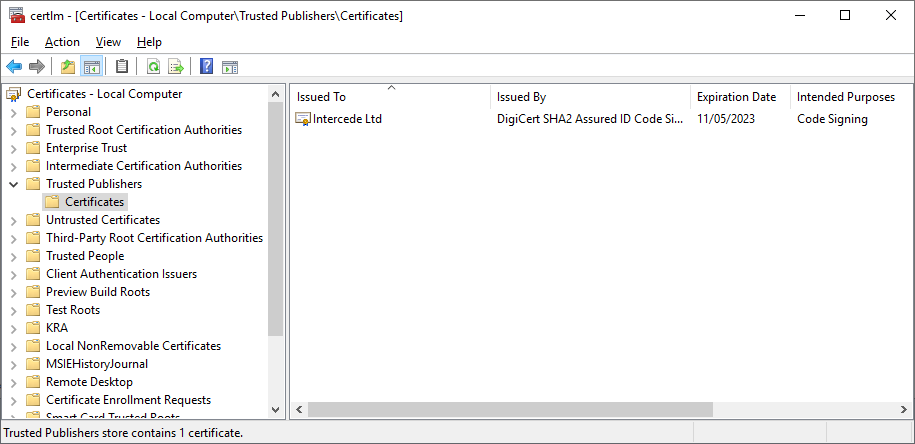
The certificate is now installed to the Trusted Publishers store.

Note: This certificate depends on DigiCert certificates:

You must obtain the DigiCert SHA2 Assured ID Code Signing CA and DigiCert root CA certificates from DigiCert if your server does not already have them.

2.2.2 Running the installation script
Important: The MyID uninstallation process requires PowerShell scripts that are provided as part of the MyID Installation Assistant package. If you move or delete the installation folder, you will be unable to uninstall MyID using the Windows Control Panel Programs and Features option; when it is unable to locate the scripts, the uninstallation process displays an error. You are strongly recommended to retain the MyID installation folder in the location from which you originally ran the installation program; this may influence your choice of folder from which to install MyID.
You must also continue to use the same installation folder for any future updates or upgrades; see section 2.2.4, Upgrading or updating the MyID Installation Assistant.
To install the MyID Installation Assistant:
-
Log on to the server as the MyID installation user.
See section 6.1.1, Installation account for details of the requirements of this user account.
-
Copy the installation package to the server and extract all the files.
The installation folder contains:
-
The Installer folder – this contains the MyID installation program.
-
The Product Documentation folder – this contains a copy of the MyID documentation set.
-
The Support Tools folder – this contains the MyID Installation Assistant scripts.
The root of the folder contains a readme and batch files to install and uninstall the MyID Installation Assistant.
-
-
Open a Windows command window.
This allows you to see any messages that the installation process produces.
-
Navigate to the installation folder and run the installer batch file:
Install-MyIDInstallationAssistant.bat
The installation script creates a MyID Installation Assistant icon on the desktop, and sets up the MyID Installation Assistant to access the MyID product documentation. If IIS is installed on the server, you can access the documentation through the following URL:
http://localhost:8080/ProductDocs/
Note: If you see a message similar to the following when running the Install-MyIDInstallationAssistant.bat batch file:
Do you want to run software from this untrusted publisher?
File C:\Install\Support Tools\MyIDInstallationAssistant\Installer\Install-MyIDInstallationAssistant.ps1 is published by CN=Intercede Ltd, O=Intercede Ltd, L=Lutterworth, C=GB and is not trusted on your system. Only run scripts from trusted publishers.
This means that your system is not configured to trust signed scripts from Intercede. You must add the certificate to the Trusted Publishers store; see section 2.2.1, Trusting the signed scripts above.
2.2.3 Uninstalling the MyID Installation Assistant
Note: You are recommended to keep the MyID Installation Assistant installed. The installation folder contains scripts that are required to uninstall the MyID server software, and you can use the MyID Installation Assistant to apply updates, configuration packages, and hotfixes to your installed system. Uninstall the MyID Installation Assistant only when you have uninstalled MyID from your server and have no further use for the software.
To uninstall the MyID Installation Assistant:
-
Log on to the server as the MyID installation user.
See section 6.1.1, Installation account for details of the requirements of this user account.
-
Open a Windows command window.
-
Navigate to the installation folder and run the uninstaller batch file:
Uninstall-MyIDInstallationAssistant.bat
The uninstallation script removes the MyID Installation Assistant icon from the desktop, and removes the link to the MyID product documentation, including removing the documentation site from IIS if necessary.
2.2.4 Upgrading or updating the MyID Installation Assistant
Important: If you already have an installation of MyID that was carried out using the MyID Installation Assistant, you must prepare the installation folder before you start an upgrade or update process.
You are strongly recommended to retain the MyID installation folder in the location from which you originally ran the installation program. You can then update this installation folder with the new installation files (documentation, installers, PowerShell scripts and so on) from the new installation media, and carry out the update or upgrade from the same folder using the MyID Installation Assistant.
To prepare the installation folder:
-
Back up the Support Tools\MyIDInstallationAssistant folder.
This prevents the loss of any TestReports and TestReportsRedacted folders or any modified defaults settings.
You may also want to archive the entire installation folder as a permanent record.
-
Run the uninstallation script for the MyID Installation Assistant.
See section 2.2.3, Uninstalling the MyID Installation Assistant.
-
Copy the contents of the upgrade or update zip file into the existing installation folder, overwriting any existing files or folders.
Make sure you copy the files and folders to the same locations; that is, the Support Tools\MyIDInstallationAssistant\ folder into Support Tools\MyIDInstallationAssistant\ and so on. The folder structure will be the same for the new installation media, although there may be additional files and folders provided.
-
Run the installation script for the MyID Installation Assistant.
Once you have updated your installation folder, you can carry out the upgrade or update process. See section 7, Upgrading MyID and section 9, Updating MyID for more information.